Adding Assessment Areas
To add a new area of assessment for the selected resident, click the  button on the right side of the screen. The Assessment Area and Services screen will be displayed. The Status of an individual does not need to be Moved-In in order to create an assessment.
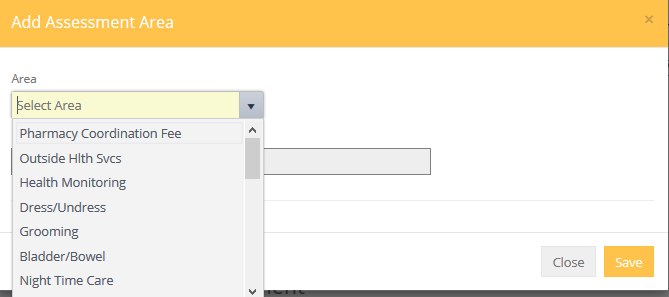
- Select the Assessment Area from the Area drop-down menu. Only Areas not previously selected are available. Determine which Task Service or Level(s) of Care are needed. Click the appropriate check box(es) and click Save. Click the Close button to return to the previous screen.
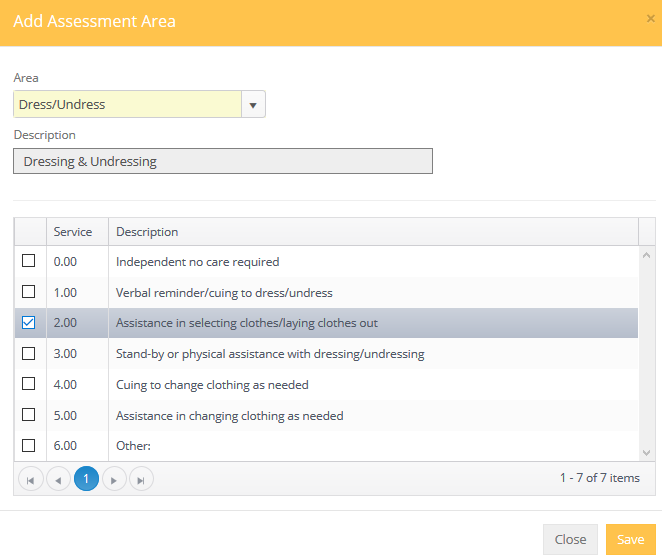
- After the Save button is clicked, the selected Task/Level of Care information for the service area will then be copied to the resident assessment record. Simultaneously, calculations required for the selected assessment method (Dollars, Time or Points) will be made and shown in the proper fields.
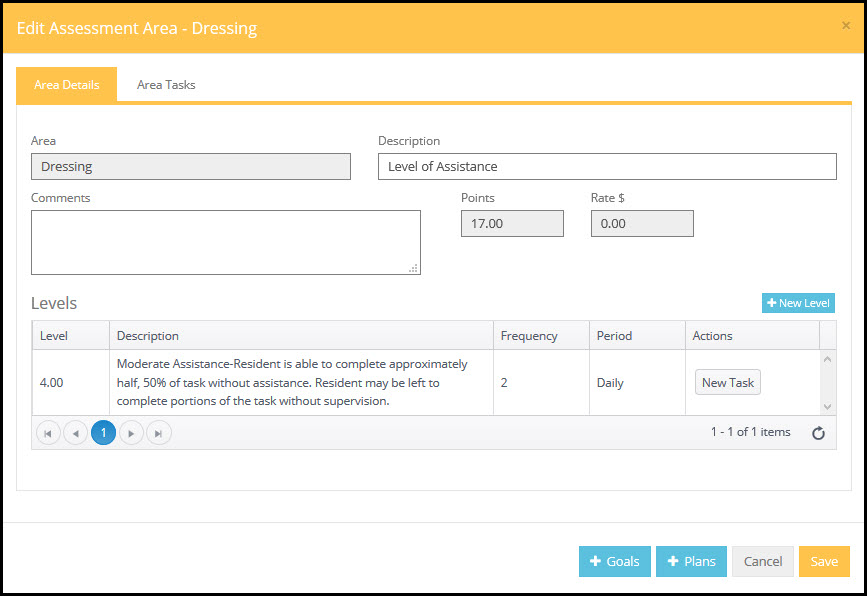
- If necessary, change the frequency, minutes, cost per minute or rate as appropriate. (this information was originally set up in the Service Area library). Remember, changing the frequency may multiply the frequency by the number of points or minutes when calculating the cost for care. You may add additional information to the Area description.
- To add comments to the specific service area type them in the Comments: box. Theses comments WILL display on the resident assessment print out.
- Select the appropriate Staff or Shift from the Staff drop down list to aid the program in calculating care costs. Costs associated with the selected Staff assignment are established in the Assignments Tab of the Preferences Library.
- Clicking the Schedule link will allow you to assign tasks to a caregiver (see the Schedule Caregiver Tasks section of help for more details).
- When all the appropriate tasks/levels have been checked, Save to assign/confirm cost calculations.
- Continue with each Assessment Area by selecting the proper Task or Level of Care for the resident until the entire assessment is complete.