Create a New Inquiry
To create a new Inquiry, select the Inquiries button from the Main Menu bar to bring up the Inquiry/Search Selection screen shown below. The Inquiry Name Selection window displays a list of any existing inquirer and potential resident names arranged alphabetically by the inquirer's last name. The list will be empty if Move-N was just installed.
Adding a New Inquiry
- You can add a new inquiry directly from the Inquiry Search Selection screen or the Dashboard.
- Click the Add New Inquiry
 button.
- A new, blank Inquiry Information screen will appear.
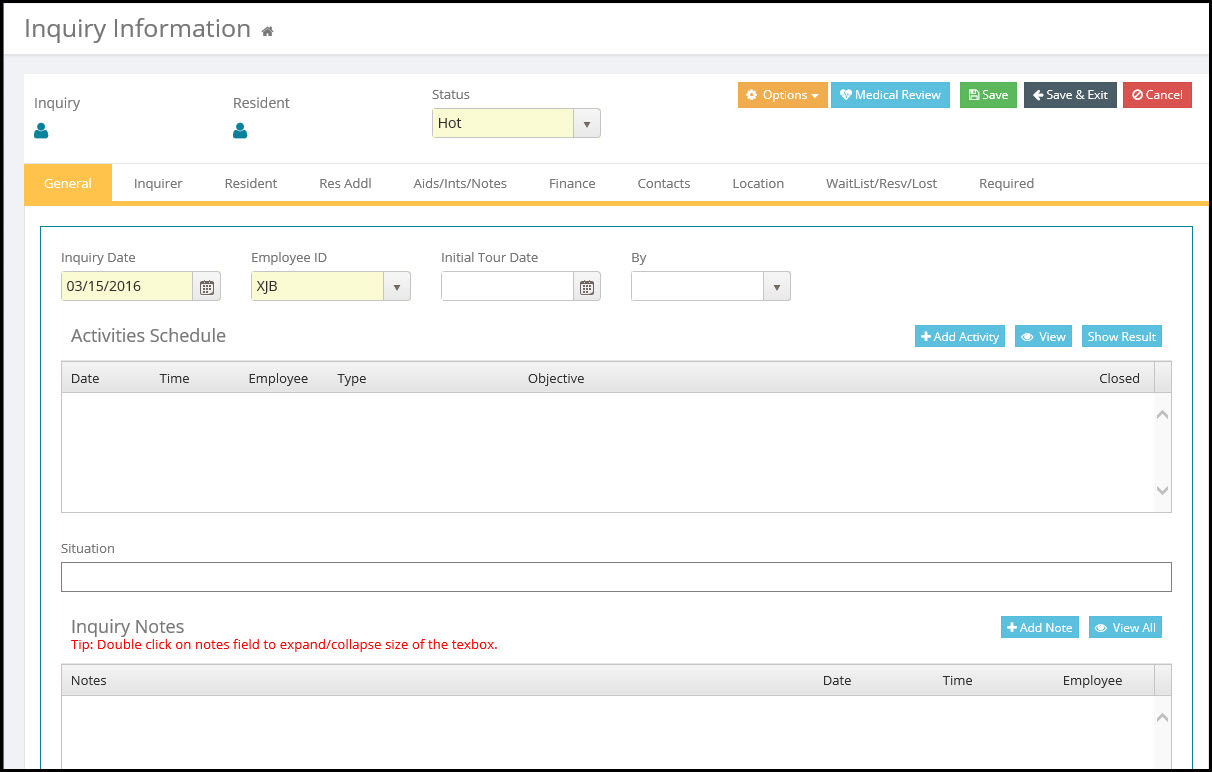
- The Status field is filled in. It is marked "Hot", according to the default set for this field in the Options tab of the Community Setup screen.
- The current date is also automatically inserted as the original inquiry Date This should be the date on which the inquirer first made contact with the center. If the first contact date was before today, change this date. Accuracy in this field facilitates accuracy in your Inquiry reports.
- The Employee ID will be filled in automatically. However, you may change it to another valid Employee ID if applicable. All Users MUST be setup in the Employee Library prior to operation of the Move-N program.
- The Inquiry Information screen has ten tabs available for entry of inquiry and potential resident information. Simply click at the top of the desired tab to enter/view information for that tab.
![]()
Following is a list of the sections on the Inquiry Information screen and definitions of some of the more important fields in those sections, along with instructions for data entry.
Inquiry Notes