Contact Appointments
Set an Appointment
There are three methods of setting an appointment with any Organization contact. The primary method is the one described here for the Contact Library. Appointments may also be set by selecting Scheduler from the Navigation Menu. (refer to the Schedule chapter of this manual).
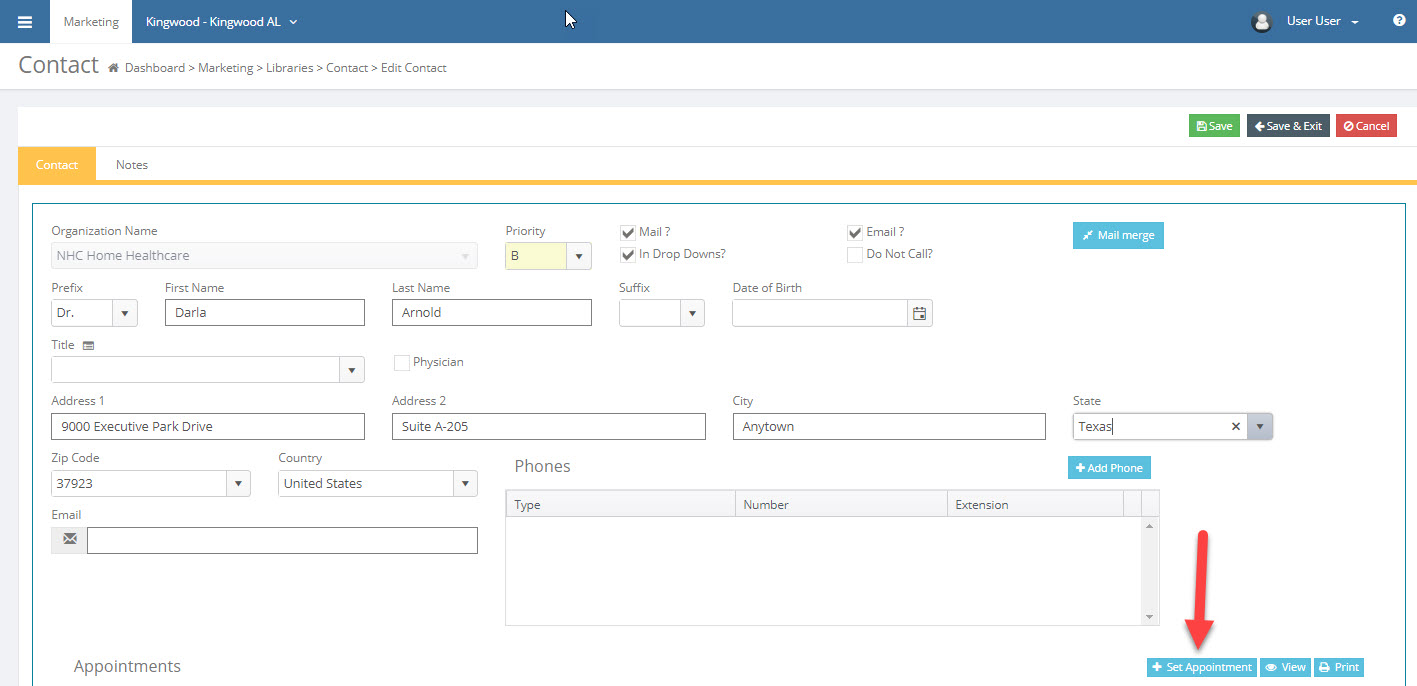
Select Marketing > Libraries > Contact.
Double click the contact to schedule an appointment.
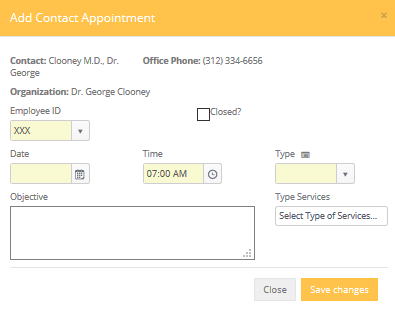
Click the Set Appointment button near the bottom of the contact screen. A pop-up will then display with the appointment information.


Employee ID: The employee id is entered by default, but this may be changed if the appointment is to be placed on another employee's schedule.
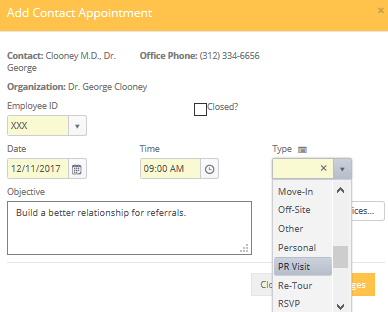
Date and Time: Set the time and date the appointment is to take place.
Type: Select the appointment Type and enter an objective (the "next step"). When scheduling Marketing activities, select one of the following 5 activity types to ensure that your Marketing activities show up as Sales Contacts on key reports such as the Productivity Report. Sales Call, Cold Call, PR Visit, Trade Show and Tour are the 5 activity types.
Objective: Enter an Objective for your marketing appointment. This is a fundamental principle in marketing, helping you identify your "next step" in developing this referral source. The Objective will also appear in your Schedule, allowing you to work from the Schedule screen without having to refer back to the Contact's Appointment History screen.

Save Changes.

Your newly added appointment appears in the Contact Appointments and the Scheduler for the User in the appointment.

Close an Appointment and Schedule Follow Up
Appointments may be closed from the Appointment History section of the Contact record, or from the Scheduler screen, explained later in this Help File. To close the Appointment from the Appointment History section of the Contact record.
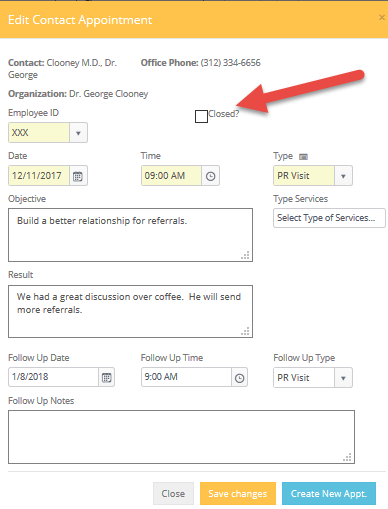
- Locate the appointment to be closed in the Appointment History section of the Contact record.
- Double click anywhere on the appointment to bring up the appointment details.

Closed?: Click this check box to close this appointment.
Result: Summarize what the outcome of the appointment was.
Schedule Follow Up
If a new appointment is desired or needed, complete the Follow Up Date, Follow Up Time and Follow Up Type to schedule the "next step".
Click Save Changes to exit this appointment and create the follow up appointment. You will now see the new appointment ready for your next discussion with the contact.

For detailed information on these functions click the links below to go to that subject.
Searching for an Existing Contact