Marketing
General
COMMUNITY CENSUS
Q. How do I enter my community census?
A. Your community census is updated automatically and is determined by the number of residents with 'Moved-In' or 'Moved-Back' status in the Move-N program. To enter a resident who was left out of the program's initial setup, treat the resident's file as if it were a new inquiry. Complete the inquiry process as described in this manual, then move-in the resident normally. Be sure to change dates to reflect original inquiry and move-in dates.
Inquiries
Add New Inquiry
General Tab
- Click “New Inquiry” from Dashboard, Inquiry Search screen or from within an Inquiry record.
- Change the date of the inquiry if necessary
- To add an activity click Add Activity on the schedule.
- Add appropriate date and time including type of activity.
- Add Objective
- Check completed box at right if activity has been completed.
- Remember: if tour has been completed be sure to document as tour and check closed to update conversion ratios and the Tour date field.
- Enter situation with simple reminder of current situation
- Enter notes
Inquirer Tab
- Enter Inquiry information by tabbing from field to field
- Recommend: include decision factors and current objection
- Required fields: Last Name, Type Service, Payor and Primary How Learn/Referral Name.
Resident Tab
- Enter Resident information by tabbing from field to field
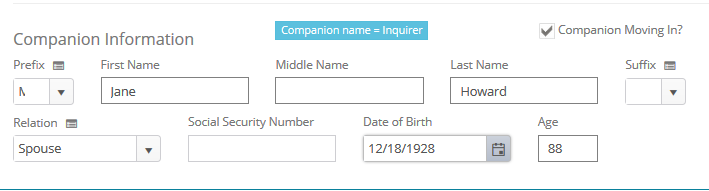
- Enter spouse information and check "Companion Moving In" checkbox if moving in with resident
- (If spouse moves in later a separate inquiry is necessary)
Location Tab
1. Select the current location of the potential resident.
Required Tab
1. Use this tab to verify all of the yellow required fields have data.
DELETING AN INQUIRY
Q. How do I delete an inquiry?
A. From the Main Menu, click Marketing > Inquiry. Locate the Inquiry and click on the line to delete. Right click and select the Delete if you are sure you want to delete this inquirer and related resident record, click Yes -- remember that this is an irreversible process! Once deleted, the inquiry and all associated information is deleted.
Residents
Move-In a Resident
- From within Inquiry record, click on the Options > Move In (top right).
- Fill in date and other applicable information (including correct room rate)
- Make sure unit, room and occupant (bed) are completed (in that order) and all yellow fields are completed.
- Save
Move-In a Resident and Companion
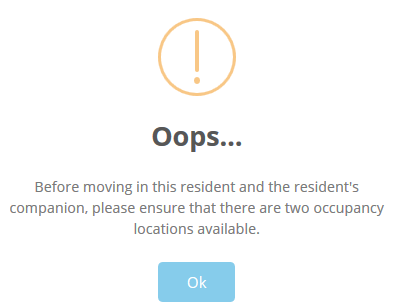
- IMPORTANT! - Before you attempt the move in make sure you have a 2nd bed available in the room you wish to move the residents in to. This is referring to a 2nd occupancy ( 'B' bed ) location in the Unit Room Library .
- A companion move in only works if the "Companion Moving In?" check box is selected in the Resident tab of the Inquiry record.
- From within the Inquiry record, click on Options > Move In (top right). You may get a popup reminder to check the available beds.
- Fill in date and other applicable information (including correct room rate)
- Make sure unit, room and occupant (bed A) are completed (in that order) and all yellow fields are completed.
- When you click Save on the primary resident move in screen you will receive the following prompt.

- Click Yes
- The next screen to appear is the companion Information screen. This is a place to record additional information about the companion. Fill out any extra details needed and then click Save.
- You will then receive the move in screen for the companion.
- Fill in date and other applicable information (including correct room rate)
- Make sure unit, room and occupant (B - bed) are completed (in that order) and all yellow fields are completed
- Click Save
Transfer a Resident
- From Main Menu > Marketing > Residents
- Double click on Resident name
- Click on Options > Transfer/Update
- Fill in date and new unit, room and occupant resident moved to including reason for transfer.
- Click Save
Move-Out a Resident
- From Main Menu > Marketing > Residents
- Double click on Resident name to open
- Click on Options > Move-Out
- Fill in all fields by tabbing or clicking from field to field
- Click Save
Move-Back a Former Resident
- From Main Menu > Marketing > Residents. (You may also use the Inquiry screen and select status Moved Out)
- Select Moved-Out from Status check box.
- Double click on resident name to open
- Click on Move-Back button
- Fill in appropriate information by tabbing from field to field
- Click Save
Move-Back a Resident from Room Hold Status
- From Main Menu > Marketing > Residents. (You may also use the Inquiry screen and select status Room Hold)
- Select Room Hold from Status check box.
- Double click on resident name to open
- Click on Options > Move-Back
- Fill in appropriate information by tabbing or clicking from field to field
- Click Save
DECEASED AFTER MOVE-OUT
Q. How do I indicate that a resident has expired AFTER move-out from the Community?
A. On the Resident Search/Selection screen, click the "Moved-Out" selection, then locate the moved-out resident's record and double-click the name. On that Resident Information screen, the resident status may be changed to "Deceased" with the Status drop-down list. This process can also be reversed in case of error.
RES ID IN SS # FORMAT
Q. Why is my Res ID not formatting properly? It is the same as the resident's social security number but it does not have the hyphens in it when it is displayed as the Res ID.
A. The Format ResID as SSN check box must be selected on the "Options" tab located in the Community Setup screen in Center Preferences. From the Main Menu Bar, click the Libraries button. Then select Community, and Community Setup. From the Community Setup screen select the Options tab. Click on the Format ResID as SSN checkbox.
RESIDENT PHOTOS
Q. How do I add a resident's photograph to his/her Resident Information screen (and print)?
A. Please see the section titled Resident Photographs in the Residents chapter.
RESIDENT OCCUPIES TWO ROOMS
Q. How do I keep my Daily Census, Occupancy, and Productivity reports accurate when a resident occupies more than one room?
A. Transfer the resident with the Conversion option checked. If you check the box that says conversion during a transfer you can select a 2nd Unit, Room, Occupancy. This allows the resident to hold and pay for two rooms.
Mail Merge
Basic Mail Merge
- Click on Main Menu > Marketing > Mail Merge
- Click on selection for mailing (Inquiries, Residents, Organizations)

- Choose criteria and then Select
- Submit Mail List(will transfer to Mail Merge Record Selection Screen) or Submit E-mail List
- Select or deselect those to receive mail
- Click on Preview Mail Merge
- Choose letter to Merge from drop down (or default Template)
- Click on Mail Merge (top right)
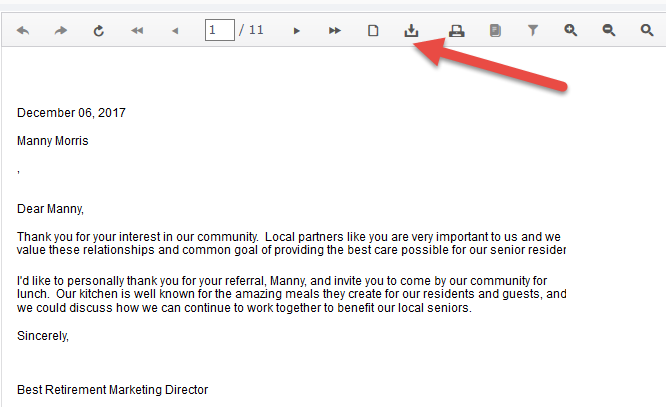
- Click on Preview Merge at top of screen
- Click on file in upper left and print
Create New Letter for Merging
- Follow steps above until you get into your document (step 6)
- Click on File/Save As prior to merging letter with names
- Save as new template name
- Edit or Write new letter
- Save
- Merge by clicking on Mail Merge (upper middle of screen) and Run Merge
- Print if desired
Basic Email Merge
- Click on Main Menu > Marketing > Mail Merge
- Click on tab to select target audience (Inquiries, Residents, Organizations)
- Choose criteria and then select Submit Email List (will transfer to Mail Merge Record Selection Screen)
- Select those to receive email
- Select Preview Email button ( the program will automatically filter out anyone without an email address)
- Select Send Global Email
- Enter email information and click Send.
Reports
DAILY CENSUS COUNT
Q. My Daily Census report count seems to be slightly off. How do I correct this?
A. In Marketing Reports under the Resident reports print the Daily Census by Location report then in the Miss reports section print the Unit Rooms Occupied report and compare the two reports. Look for discrepancies between the two reports. Be careful editing items, which could affect billing. If you need assistance in reconciling please contact Move-N Technical Support to discuss.
Other factors that might lead to perceived census issue could be the option in Community Setup to include Room-Holds in reports.