Set Up Service Areas
- Click the
 button at the top right corner of the screen. The cursor is now positioned in the "Service Area" field.
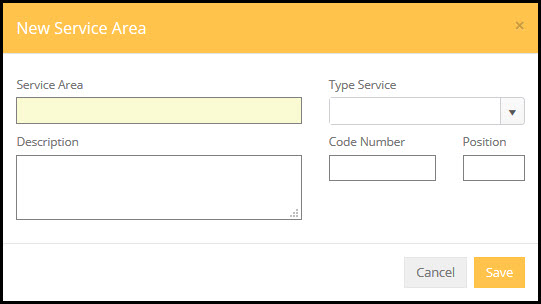
- Service Area: Type in the new Service Area name.
- Type Service: If this Service Area is unique only to one type service you can select that type of service here. If this Service Area applies to multiple Type Services you should leave this field blank.
- Description: Enter a brief Description of the Service Area.
- Code Number: This is an optional field.
- Position: A Position number may be entered to specify the order the particular Service Area is to appear in the actual assessment drop-down lists on the Resident Assessment screen. (Entering a position number that is already in use without renumbering the remainder of the list may cause the list to be displayed in a slightly different order than desired.)
- Add as many Service Areas as desired by repeating the above steps.
To delete a Service Area, right click the Service Area, and click the Delete button. A Service Area may only be deleted when there are no levels of service listed.